
ROing a match in riflematch.com is as easy or as detailed as you want it. You can use it to simply record scores if you use a separate timer, or you can use the built in timer. You can download data to a local database for full offline capabilities.
Getting in to RO mode
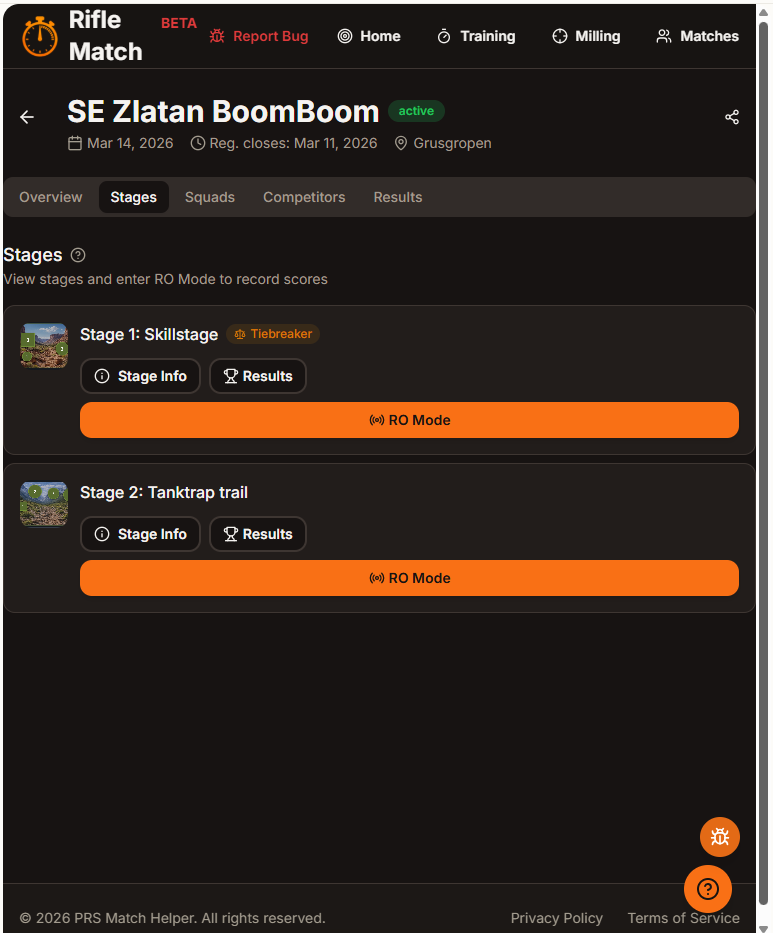
To get in to RO mode, simply navigate to your match and click the Stages tab. When you do that, you will see a list of stages. Here you have an overview of the stages.
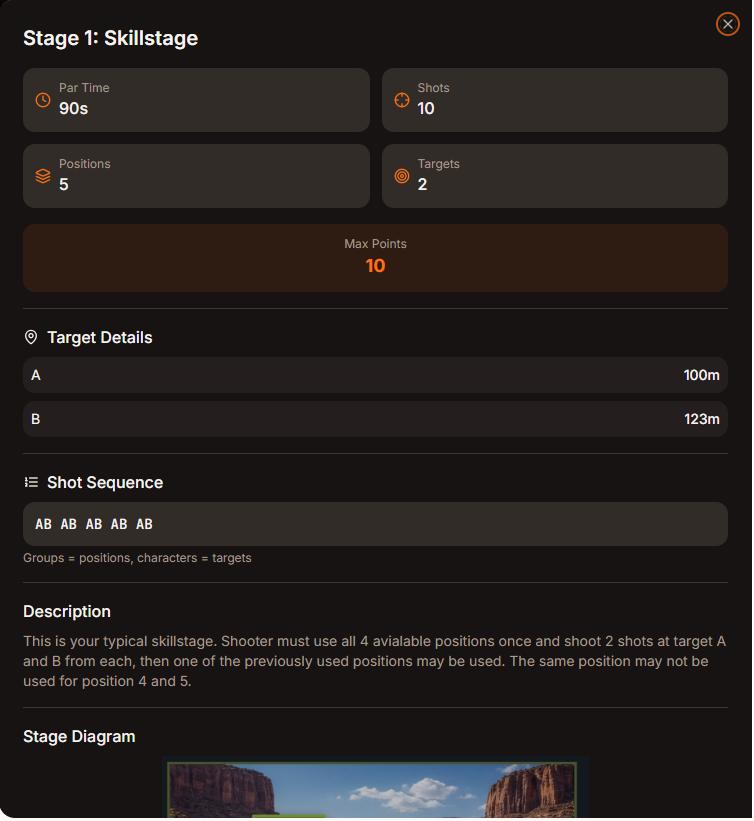
When you want to do a stage brief, click Stage Info for the stage you are managing. Here you can see all documented info as par time, shots, max points, positions and targets. If the Match Director has entered it you can also see target distances and incline angels. Shot sequence is a simplified listing of what targets are to be shots from each position. The logic is simple, targets are listed in the order they are to be shot and the space divides the positions. This is also used in the more advanced modes to help you keep track of what position the shooter should be in.
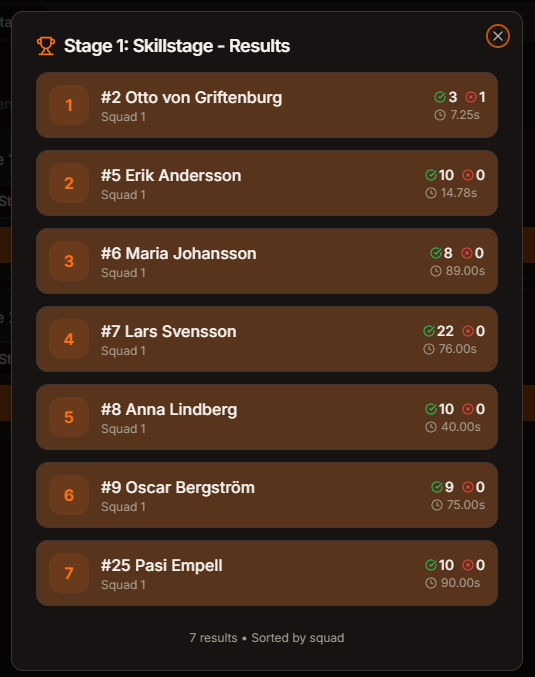
If you want a list of results you simply press the Results button to list hits/misses/time for each competitor.
RO Mode, Range Officer mode
When you are ready to start the stage and let the competitors shoot simply press the RO Mode button. This is where you select the competitor and what way you want to enter the scores. In the upper part of the screen there is the option to download the match data locally. If you do this the database is stored on your device and automatically updated to the server when you have internet connection. If you know that you are in an area with bad connection or if you want to conserve battery by using airplane mode, you press Download Now.
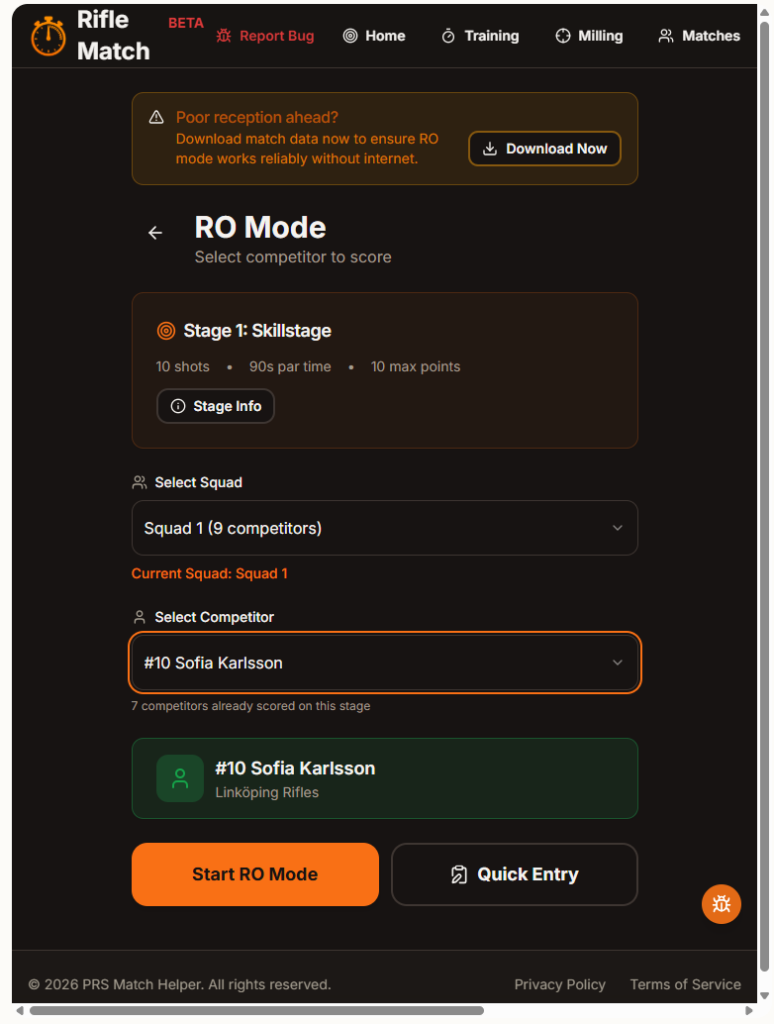
To select the competitor you first select squad and then competitor using the drop down list. Once a competitor has had a result entered the next competitor in the order will be displayed for your convenience. Finally, you have two (well, three actually) ways to manage the stage timing and scoring.
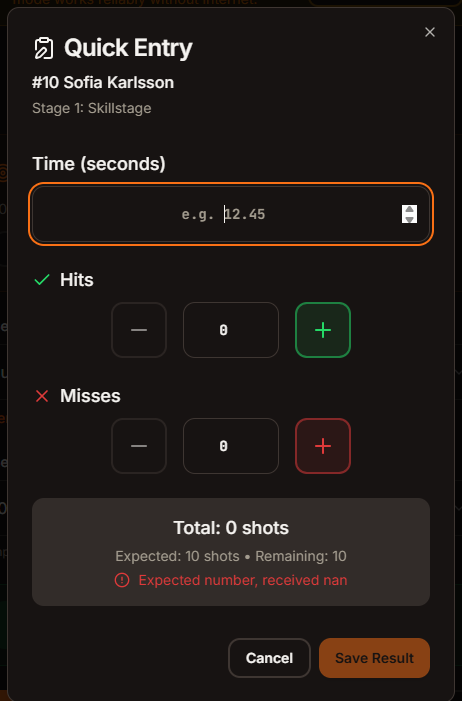
Quick Entry
Quick entry is what you use if you are using a separate timer. Pressing this will let you record time, hits, and if you want to also misses. Once you save you are done. You will not be able to enter more points than available at this stage.
Start RO mode
In true RO mode you have the option to use your device as a shot timer. There are basically two modes Quick and Individual. To set this you go to the settings by pressing the gear icon in the upper right of the screen. This will show you a lot of different settings, we will only go through the absolutely basic ones at this point.
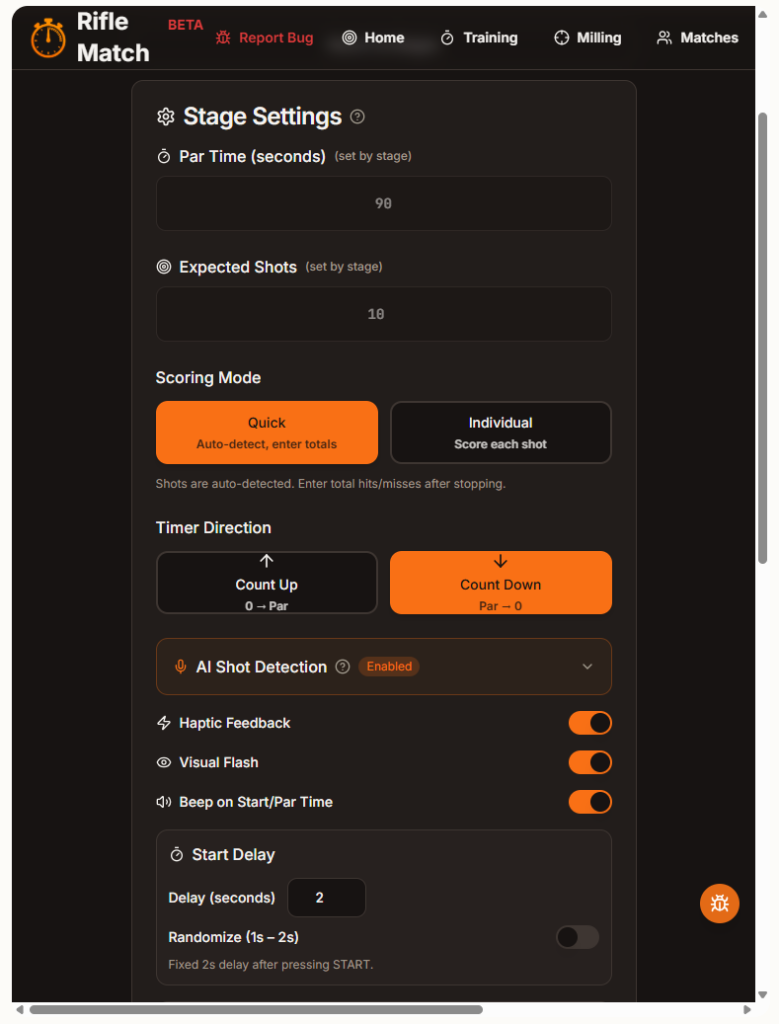
When using RO mode in a match you will not be able to set Par Time and Expected shots, since they are determined by the Match Director when creating the stages. The different scoring modes (Quick and Individual) will be explained below. You can set Timer direction to your preference and also start delay and if you want start to be randomized. Don’t bother with the other settings for now. Once you have made your selections scroll down and click Done to close the settings panel.
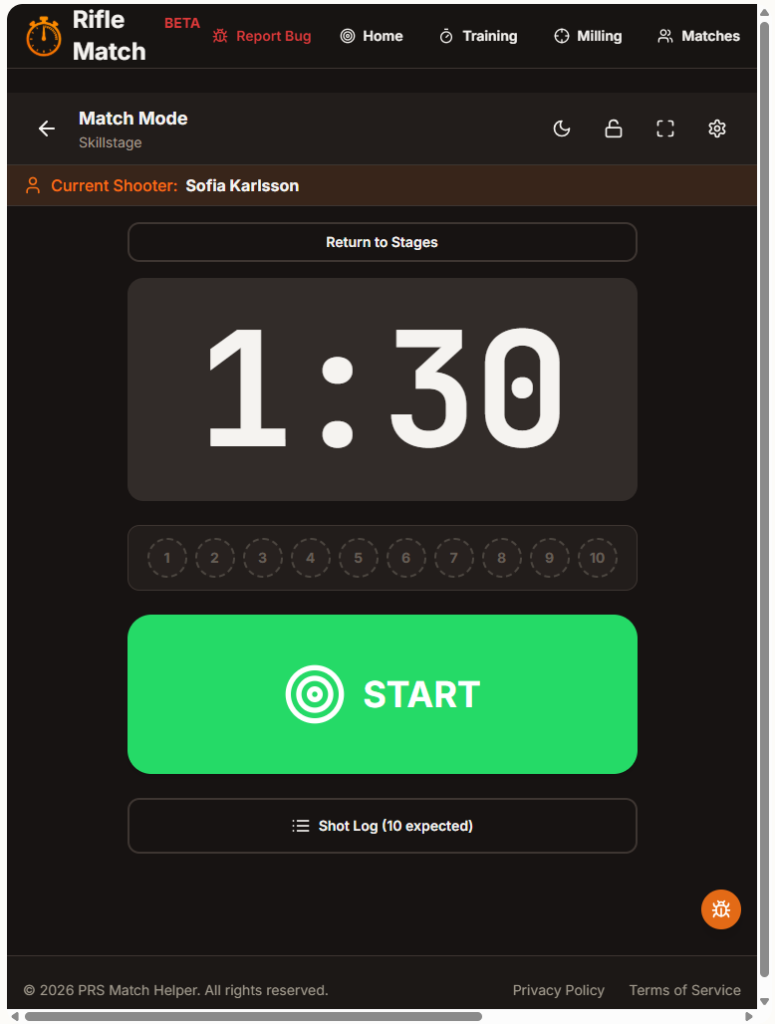
Quick Scoring Mode
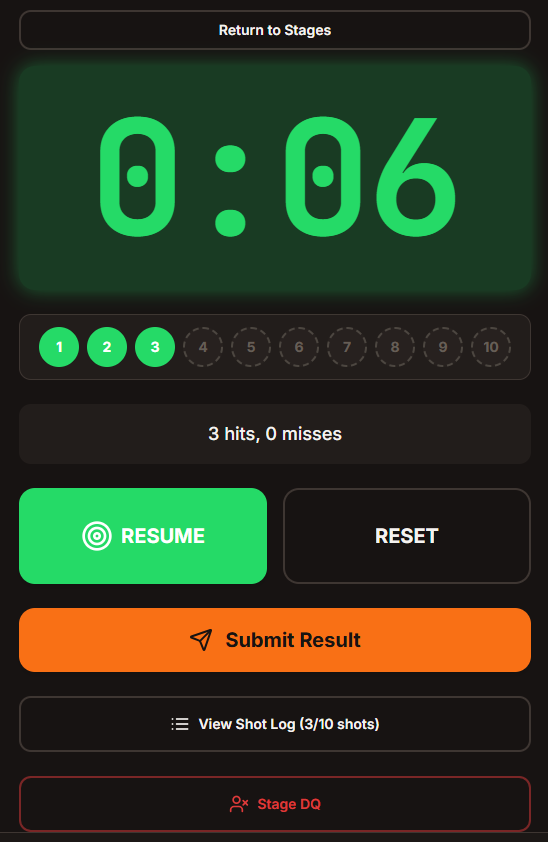
The Quick Scoring Mode is a simplified timer what lets you use the device as a timer and record the hits/misses after the shooting is done. Then when you press stop the timer is stopped and that time is recorded. Manually enter hits (and/or misses if you want to do that) and press Confirm Scores.
When you have entered hits/misses you have a few options, either just Submit Result and move to the next competitor. You can also select View shot log (see further down). On this page you can also document a Stage DQ and the results will be discarded.
Individual Scoring mode
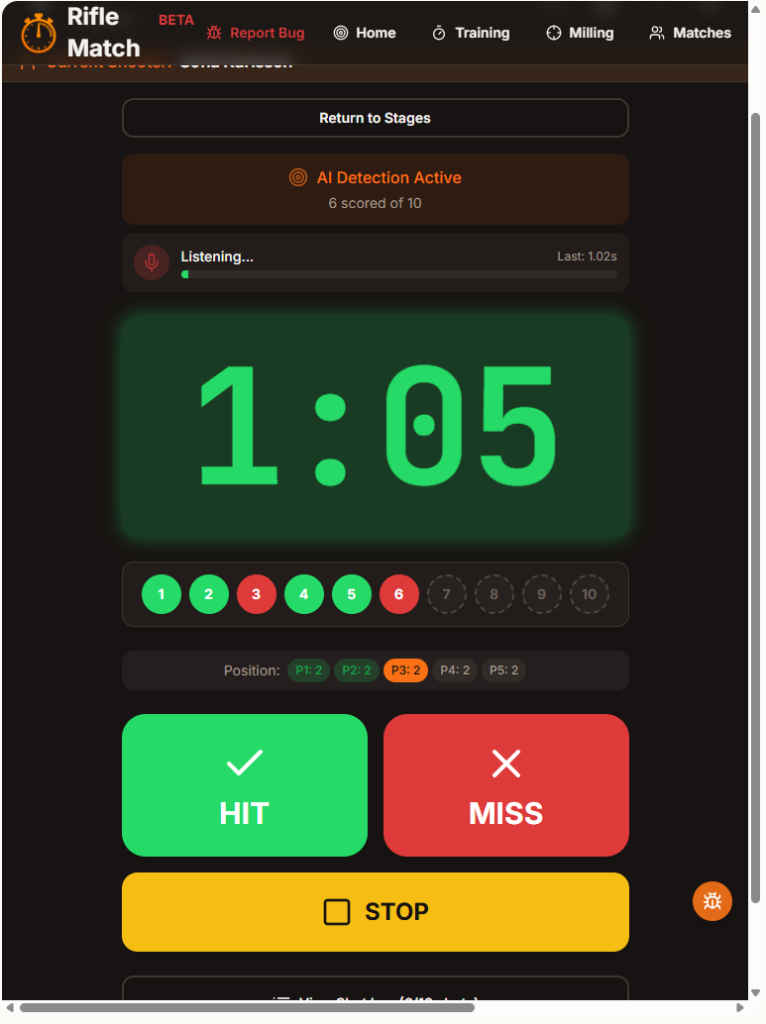
Now we are getting into advanced scoring with a bunch of new features. First, AI shot detection will help you record the timing of the shots. Second, you will be able to record hits and misses, a feature that can give really advanced data and statistics later. The device will detect the shot and also record the time you press hit/miss as a backup.
The Position bar will use the Shot Sequence defined in the stage description to help guide you towards what position the shooter should be on at the moment of shooting. This can help you if the shooter gets confused so you know how to record hits/misses correctly. When the shooting is done you press Stop to finish scoring. When you are done reviewing the scores press Submit results and go to the next competitor.
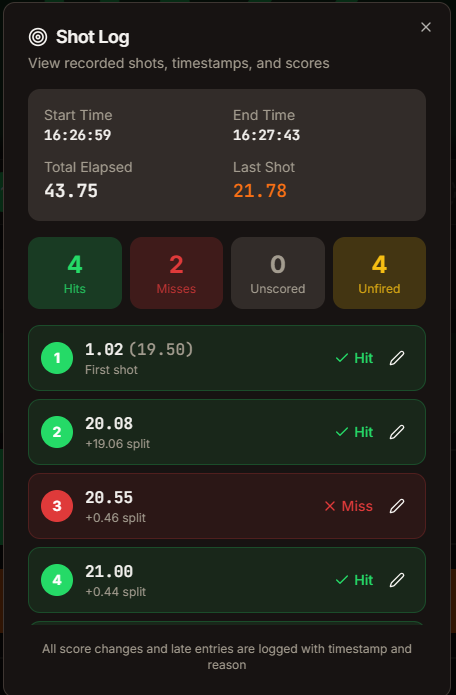
Shot Log
When in Shot Log mode you can see details of the shots as they are recorded by the device and the data you entered. When using Quick Scoring mode the device has no way of knowing what shots are hits/misses so they are simply listed. When using Individual scoring mode the times and split times are listed as recorded. If the device recorded the shot it is listed with the time of your recording it in paranthesis. If no shot was detected the time you recorded the hit/miss is shown. Here you can also edit the result afterwards in case you press the wrong button or there is a dispute. If you change a score afterwards you will have to record a reson for the change for review purposes.
Easy peasy!
Upptäck mer från
Prenumerera för att få de senaste inläggen skickade till din e-post.